

ST makes the very popular STM32 line of ARM Cortex M microcontrollers, which have a good amount of hobby and professional users, but ST also makes a lesser known family of microcontrollers, at least, lesser known except in China. The STM8S series are 8 bit microcontrollers with their own CPU core and peripherals that are fairly similar to the ones on STM32 devices. And they are used on a lot of cheap Chinese gadgets and DIY boards. Slowly some hobbyist interest also is starting to form and there is an Arduino like library available and good support in the interesting Forth language. Sadly, an C IDE with debugging support, like the STM32 system workbench is not available, at least, not for Linux. There is ST Visual Develop but it’s a bit crusty and Windows only.
The STM8 devices are cheap, really really cheap. But apart from being very cheap and in a lot of Chinese gadgets, for hobby use just grabbing an Arduino, STM32 or other mode popular board is a lot easier to get running and to get support. But if you want to try a new architecture, hack some Chinese gadget or need a microcontroller that is less then 0.25usd in bulk. please read on.
I already made a few makefile projects for the STM8S, but that still lacks debugging, so time to do it a bit better. And why not make everything work in Eclipse while we’re at it. This is all tested on Debian Stretch, I imagine it will work on any Debian based distro like Ubuntu or Mint and without too much changes on any other distro, but your mileage may vary.
As the SDCC compiler is unable to optimize unused functions, the makefile splits every C file from the peripheral drivers into a separate file and then compiles a library. This way the code size remains small. The downside is that stepping into a function like GPIO_WriteReverse does not work when debugging. As these drivers are provided by ST and probably tested, I don’t find this a problem, but good to keep this in mind.

Look at that fancy debugging support :D
First of all, there are a few things needed. Most importantly, an STM8S microcontroller and debugger. I use the cheap STM8SVLDISCOVERY board. It has an STLINK debugger and an STM8S003 uC on board for around 7 euro’s. Though an ST-Link + stm8s breakout board on Ebay is a tad cheaper, nothing beats plug and play dev boards.
On the software side, a few things are needed. First of all the compiler, a newer version of the SDCC compiler is needed. At the time of writing, 3.8 is just released. The version available with apt install is probably a bit too old. For debugging support, the stm8-binutils are required as well as OpenOCD. If you want to use Eclipse, Eclipse is of course also needed.
Installing SDCC
Let’s start easy with SDCC. Best is to download the latest version from Sourceforge, uncompress it and run the command “sudo cp -r * /usr/local” which will copy the binaries to the correct directory. The Install.txt file included provides more explanation on how to install it and what it exactly installs where. After installing, test the installation by running the “sdcc -v” command, which should report back the version number. In my case the output was:
sdcc -v
SDCC : mcs51/z80/z180/r2k/r3ka/gbz80/tlcs90/ds390/pic16/pic14/TININative/ds400/hc08/s08/stm8 3.8.0 #10557 (Linux)
published under GNU General Public License (GPL)
That was all, the SDCC compiler is installed now. To update it, download the newest version and repeat.
Installing STM8-Binutils
Sadly, there is no support for the STM8 in GDB and Binutils. Luckily someone made a set of patches to add support. This does means compiling binutils ourselves, but it’s not as bad as you might imagine.
The patch set includes a script that downloads the sourcecode, patches it and builds it, meaning it’s a few commands and a coffee break of work. To do so, download and uncompress the files from here. After uncompressing, execute the patch_binutils.sh script and the configure_binutils script. After that, navigate to the binutils-2.30 folder and execute “make” followed by “sudo make install”. This should take care of installing STM8-binutils. To test it, execute “stm8-gdb –version” command, which should output something like this:
stm8-gdb --version
GNU gdb (GDB) 8.1
Copyright (C) 2018 Free Software Foundation, Inc.
License GPLv3+: GNU GPL version 3 or later <http://gnu.org/licenses/gpl.html>
This is free software: you are free to change and redistribute it.
There is NO WARRANTY, to the extent permitted by law.  Type "show copying"
and "show warranty" for details.
This GDB was configured as "--host=x86_64-pc-linux-gnu --target=stm8-none-elf32".
And now Binutils is also installed, not too bad right.
Installing OpenOCD
OpenOCD can be installed using the normal apt install openocd command. Version 0.9 or higher should work. The only thing missing is the stm8 target scripts, they can be downloaded here. The needed ones are: “stm8s003.cfg, stm8l.cfg, stm8l152.cfg, stm8s.cfg and stm8s105.cfg”. The default location for these files is “/usr/local/share/openocd/scripts/target/” or “/usr/share/openocd/scripts/target/” and after placing them there, OpenOCD should find them.
Using Eclipse to build and debug.
And now the interesting part. Eclipse supports makefile project, and I already made a makefile project for the STM8S003, so that should work without any problems. Debugging support is a bit more work, but Eclipse just needs to be told what gdb command to run and how to connect to the target. It is assumed that a modern version of Eclipse is installed and the user is familiar with Eclipse to some extent.
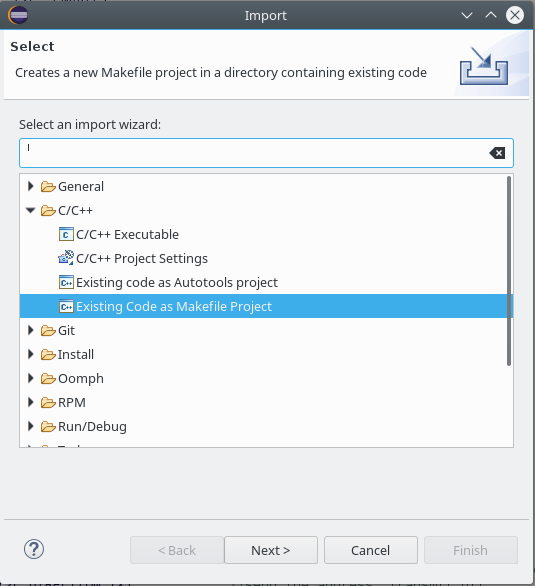
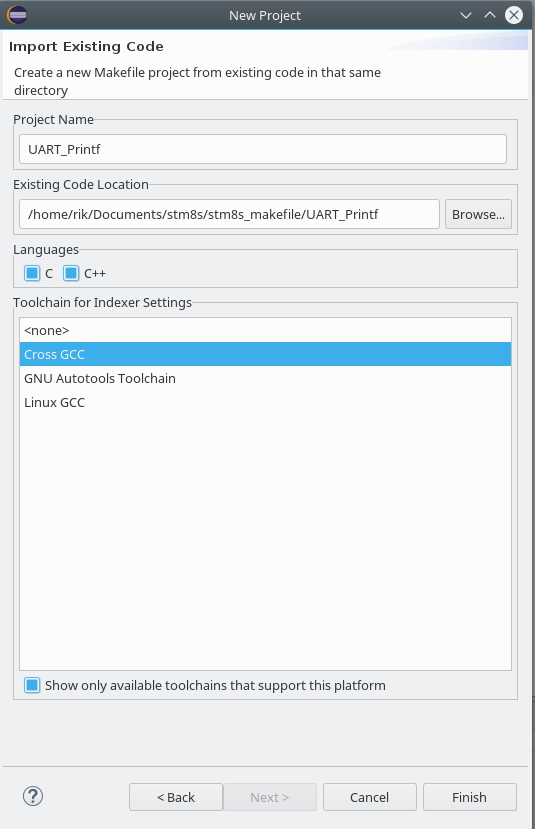
First, download the stm8s makefile project from github, rename the “Base_project” to a more suitable name. I wanted to make an EEPROM example, so I renamed the folder to “EEPROM” Then import the project as an existing makefile project, go to File -> Import and select Existing code as Makefile Project.
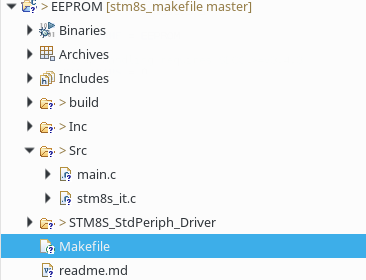
After importing a project it should look like this in the Eclipse workspace:
The Makefile has to be changed, so the binary generated has the correct name, by default it will be called “blinky.elf”. Open the makefile and edit the name after “TARGETNAME =”
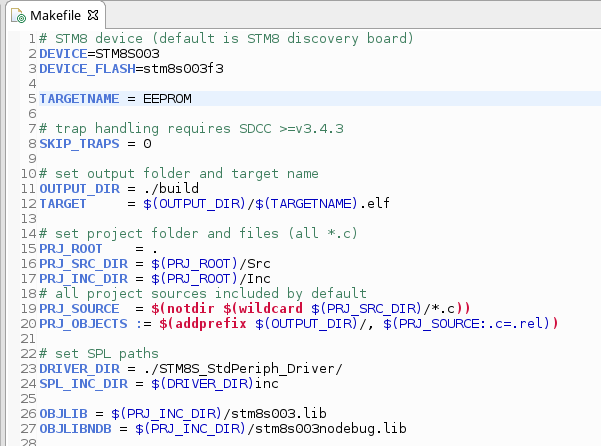
In my case, I changed TARGETNAME to EEPROM as shown.
By now, Eclipse should be able to build the project and clean it with a rightclick on the project and selecting “build” or “clean”. But let’s add debugging support, open the debug configuration window:
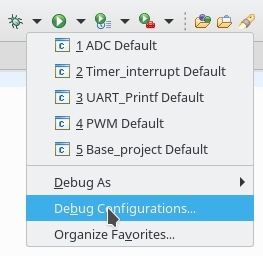
and add a new debug configuration by doubleclicking on “GDB Hardware Debugging”
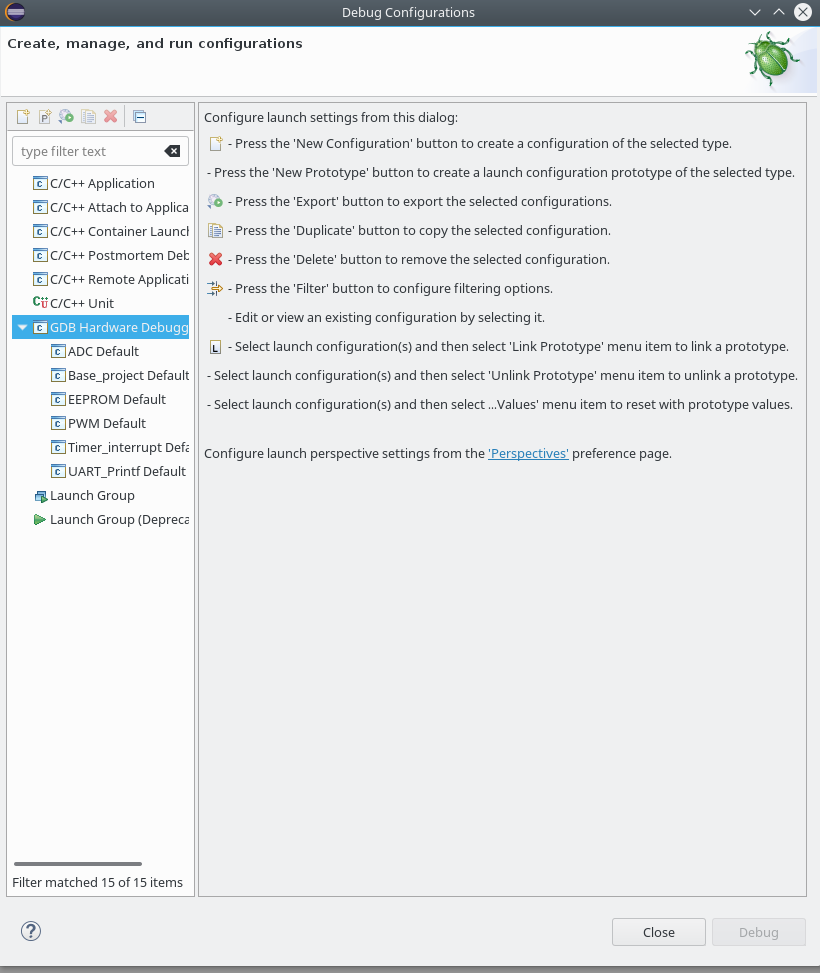
This will add a new config, called “projectname Default”, in my case “EEPROM Default” Click on it to change a few settings:
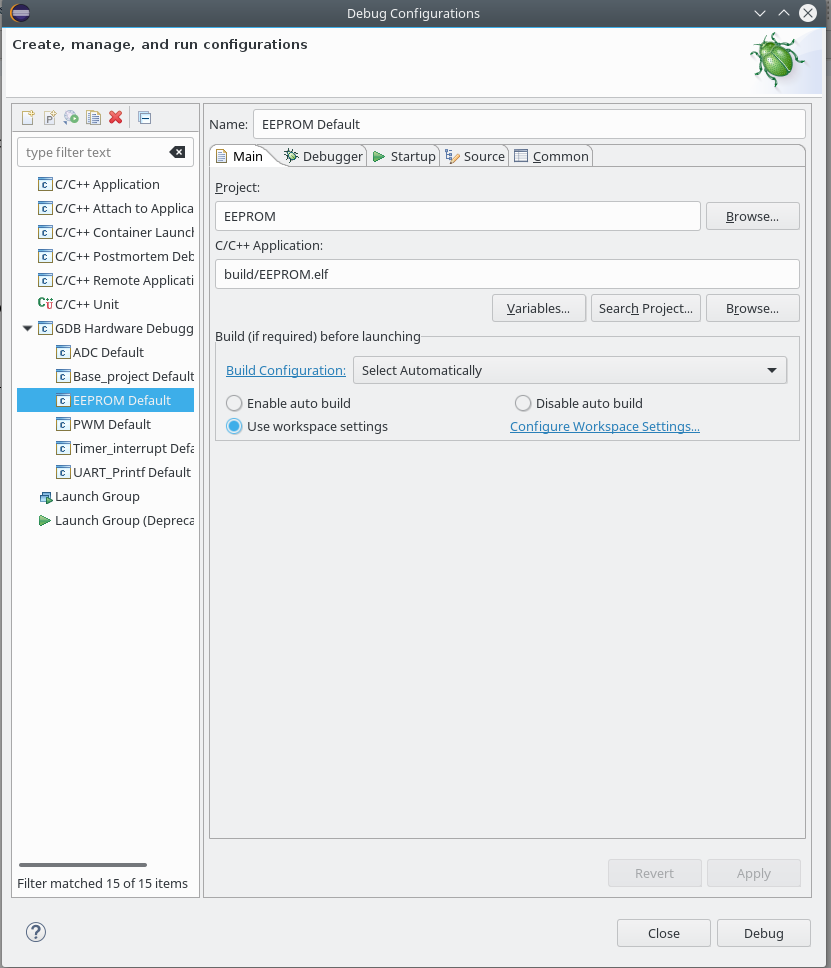
In the main window, make sure the C/C++ Application is called build/targetname.elf, in my case build/EEPROM.elf. If you have not build the project, it will complain that the file is not found, which can be safely ignored.
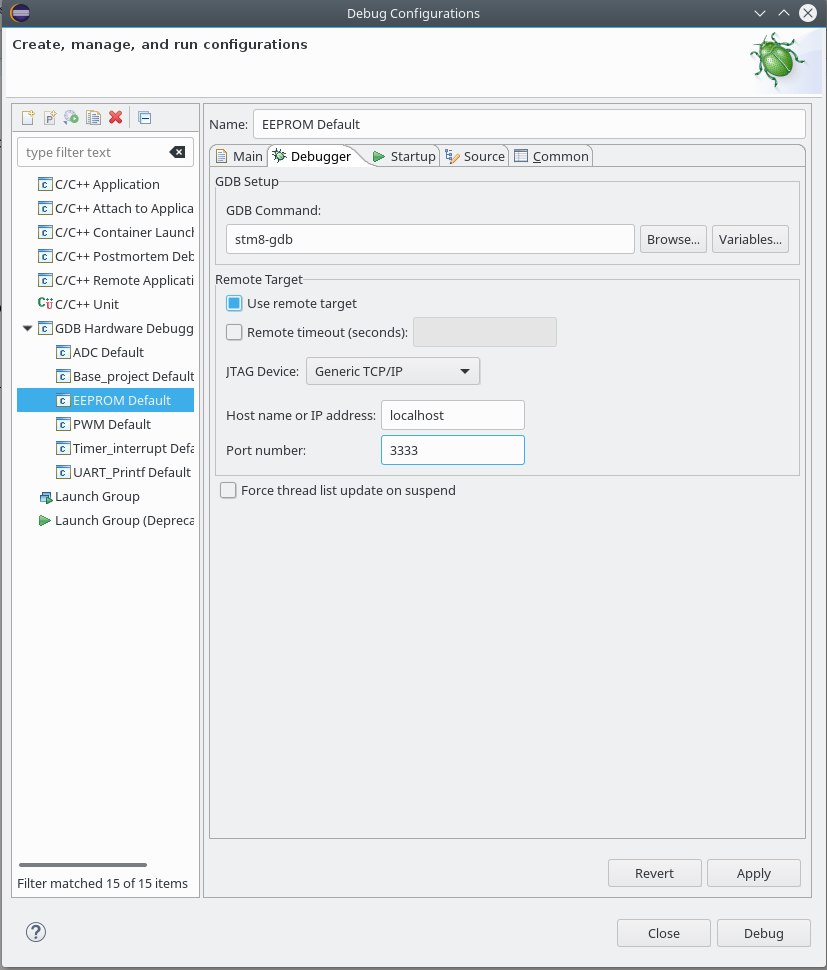
In the Debugger window, set the GDB command to stm8-gdb which was installed earlier. Also change the Port number to “3333”. After that, Apply and close the view.
Almost there, before you can debug the project, OpenOCD has to be started. The quickest way is probably by opening a terminal and executing the following command:
openocd -f interface/stlink.cfg -f target/stm8s003.cfg -c "init" -c "reset halt"
This only has to be done once, as long as it runs you can debug as much as you want.
Now you can clean, build and debug the project by rightclicking on the project and selecting clean, build or debug. Just make sure to first build, then press debug. Else it cannot find the binary file.
Making it a bit easier to use
The makefile I made also supports making a hex file and directly flashing the hex file. To do so from Eclipse, I like to add a few build targets, making it look like this:
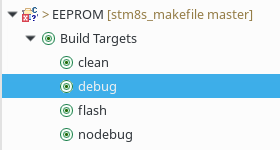
Now I can doubleclick on something and done, especially with flash, doubleclick to compile and flash the board is really handy.
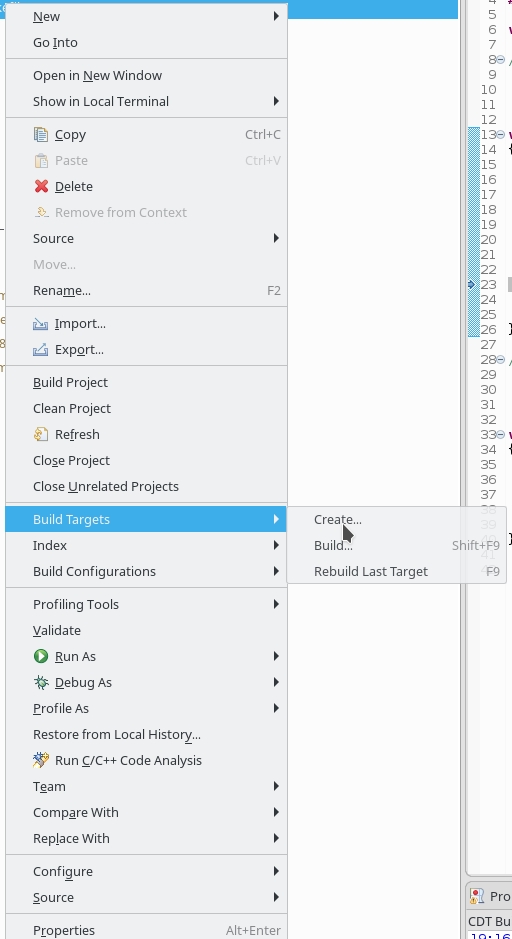
To add these, rightclick -> Build Targets -> create.
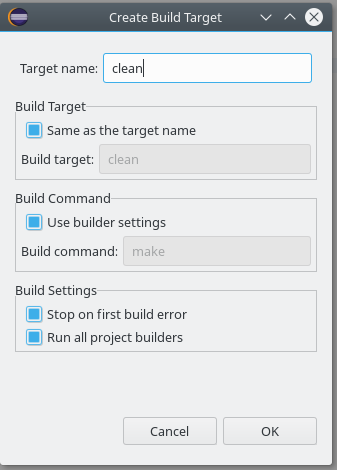
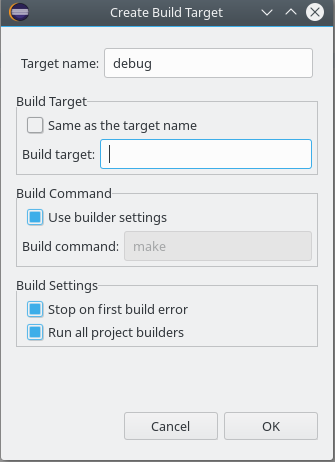
For the 4 targets I have above, this needs to be done 4 times with the following settings:

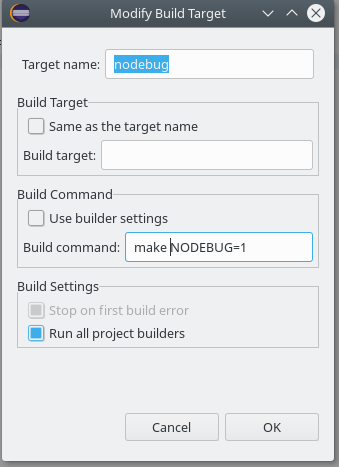
And that’s it, debugging an STM8S using eclipse. More work then using something like an Arduino or STM32, but with the help of nice projects like stm8-binutils and SDCC, quite possible to get working in an afternoon.
Hi,
Thanks for sharing your experience. I followed the instructions but I get some errors is ‘make’ process and therefore ‘make install’ cant completely done.
Hi,
you mean while installing STM8-Binutils? In my case, I have to execute make as root. This should work.
Thanks for guide, but the problem is still the same!
If it is the same error i got, it’s just a missing package.
Try installing texinfo first using sudo apt-get install texinfo
Hi, fortunately the error was the same! After installing ‘texinfo’ the problem has solved. But what needs ‘texinfo’?
New problems are coming! when run the following command:
openocd -f interface/stlink-v2.cfg -f target/stm8s003.cfg -c “init” -c “reset halt”
the following error occurred:
embedded:startup.tcl:21: Error: Unknown target type stm8, try one of arm7tdmi, arm9tdmi, arm920t, arm720t, arm966e, arm946e, arm926ejs, fa526, feroceon, dragonite, xscale, cortex_m, cortex_a, cortex_r4, arm11, ls1_sap, mips_m4k, avr, dsp563xx, dsp5680xx, testee, avr32_ap7k, hla_target, nds32_v2, nds32_v3, nds32_v3m, or1k, quark_x10xx, or quark_d20xx
in procedure ‘script’
at file “embedded:startup.tcl”, line 60
at file “/usr/share/openocd/scripts/target/stm8s003.cfg”, line 11
in procedure ‘target’ called at file “/usr/bin/../share/openocd/scripts/target/stm8s.cfg”, line 69
in procedure ‘ocd_bouncer’
at file “embedded:startup.tcl”, line 21
can anyone help me?
Hi! I have same problem as you. I installed openocd from apt on a Ubuntu 18.04, but it is not working. After I build it from sources, and it works! So, the current version of openocd from git already contains the stm8 target. Good luck! :)
Thank you so much!
Hi
Thanks for this.
A Linux based STM8 development environment with debugging capabilities would open up the STM8 to many more.
But I have not been able to get the debugging to start.
I installed SDCC, stm8-binutils and OpenOCD.
I made a clean (i.e. first time) install of Eclipse CDT Oxygen.
The example project code builds fine.
When I try to start a debug session I get the following error
Error in final launch sequence
Failed to execute MI command:
-exec-run
Error message from debugger back end:
localhost:3333: Connection timed out.
localhost:3333: Connection timed out.
Any ideas?
Are there any other Eclipse plugins required?
System is Linux Mint Cinnamon 19.1
Thanks for all the work put into this.
Take care
Mike
Thank you for the clear explanation. Because of you I am now debugging code on the STM8! using open source tools!
Take care,
Paulo
Haha, wow, i just found this page. Great stuff . I’ve been writing up pretty much my own version of this exact same article. Could have saved myself some time if i’d known you’d already written this…. At the very least, i could have ‘borrowed’ some of your material, hah
Anyway see what ive got so far, here: https://github.com/prosper00/STM8-AD9833-Function-Generator/wiki
Thanks, and that looks nice :)
It never hurts to have more tutorials, and you are welcome to borrow a few things :)
Where did you “make” stm8-gdb on? I tried on both VMware and Ubuntu, the “make” always failed with .fbd errors.
Hi. I believe I did that on either Ubuntu 20.04 or Debian. What are the errors you are getting?