

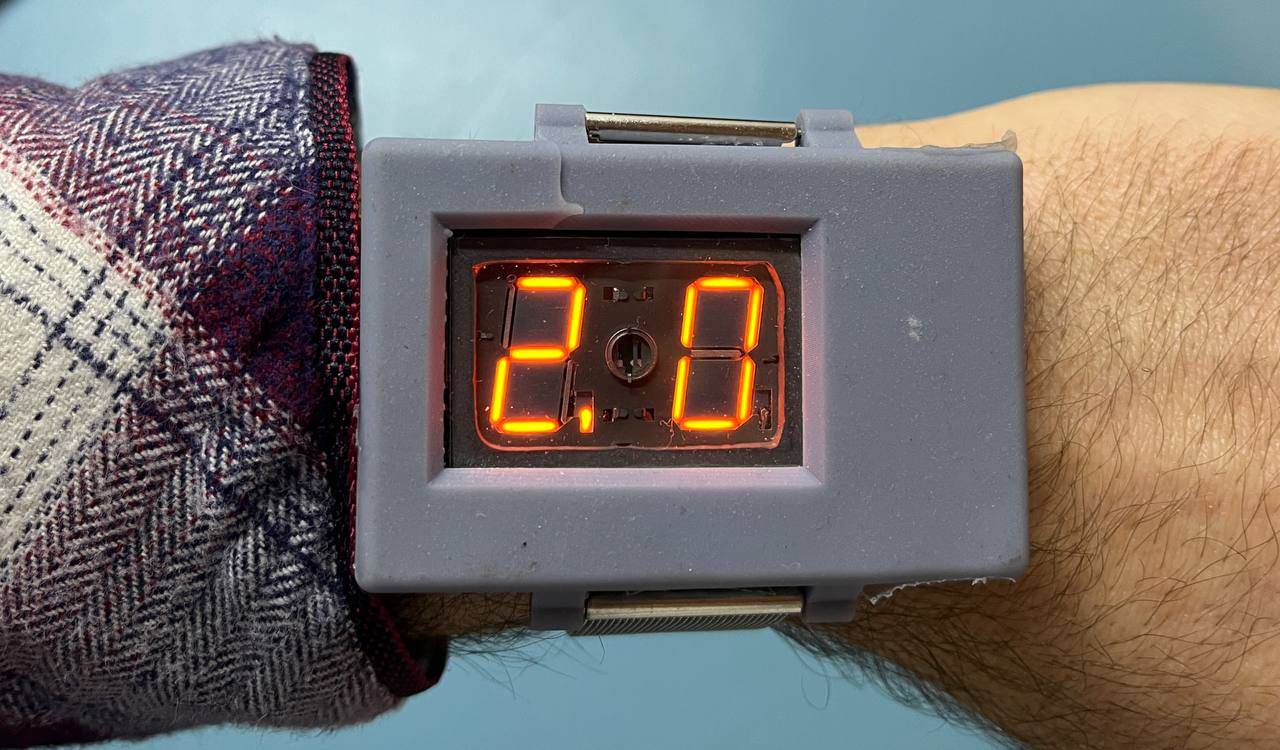
Ok ok ok, this is not a Nixie, it’s a Panaplex watch, but that sounds so much less fun. They work like nixies, but they are flat and often 7 segment displays, somewhat common in alarm clocks and tech gear.I got a few of them from a friend and compared to nixies, they are rather small and flat. So why not make a wristwatch with them!
Like nixies, panaplex displays require a high voltage to operate, around 200V. Which, on a wristwatch is a little challenging. I also wanted this to be a somewhat usable watch, unlike some of the nixie watches that, while cool, look quite cumbersome to wear due to their size.
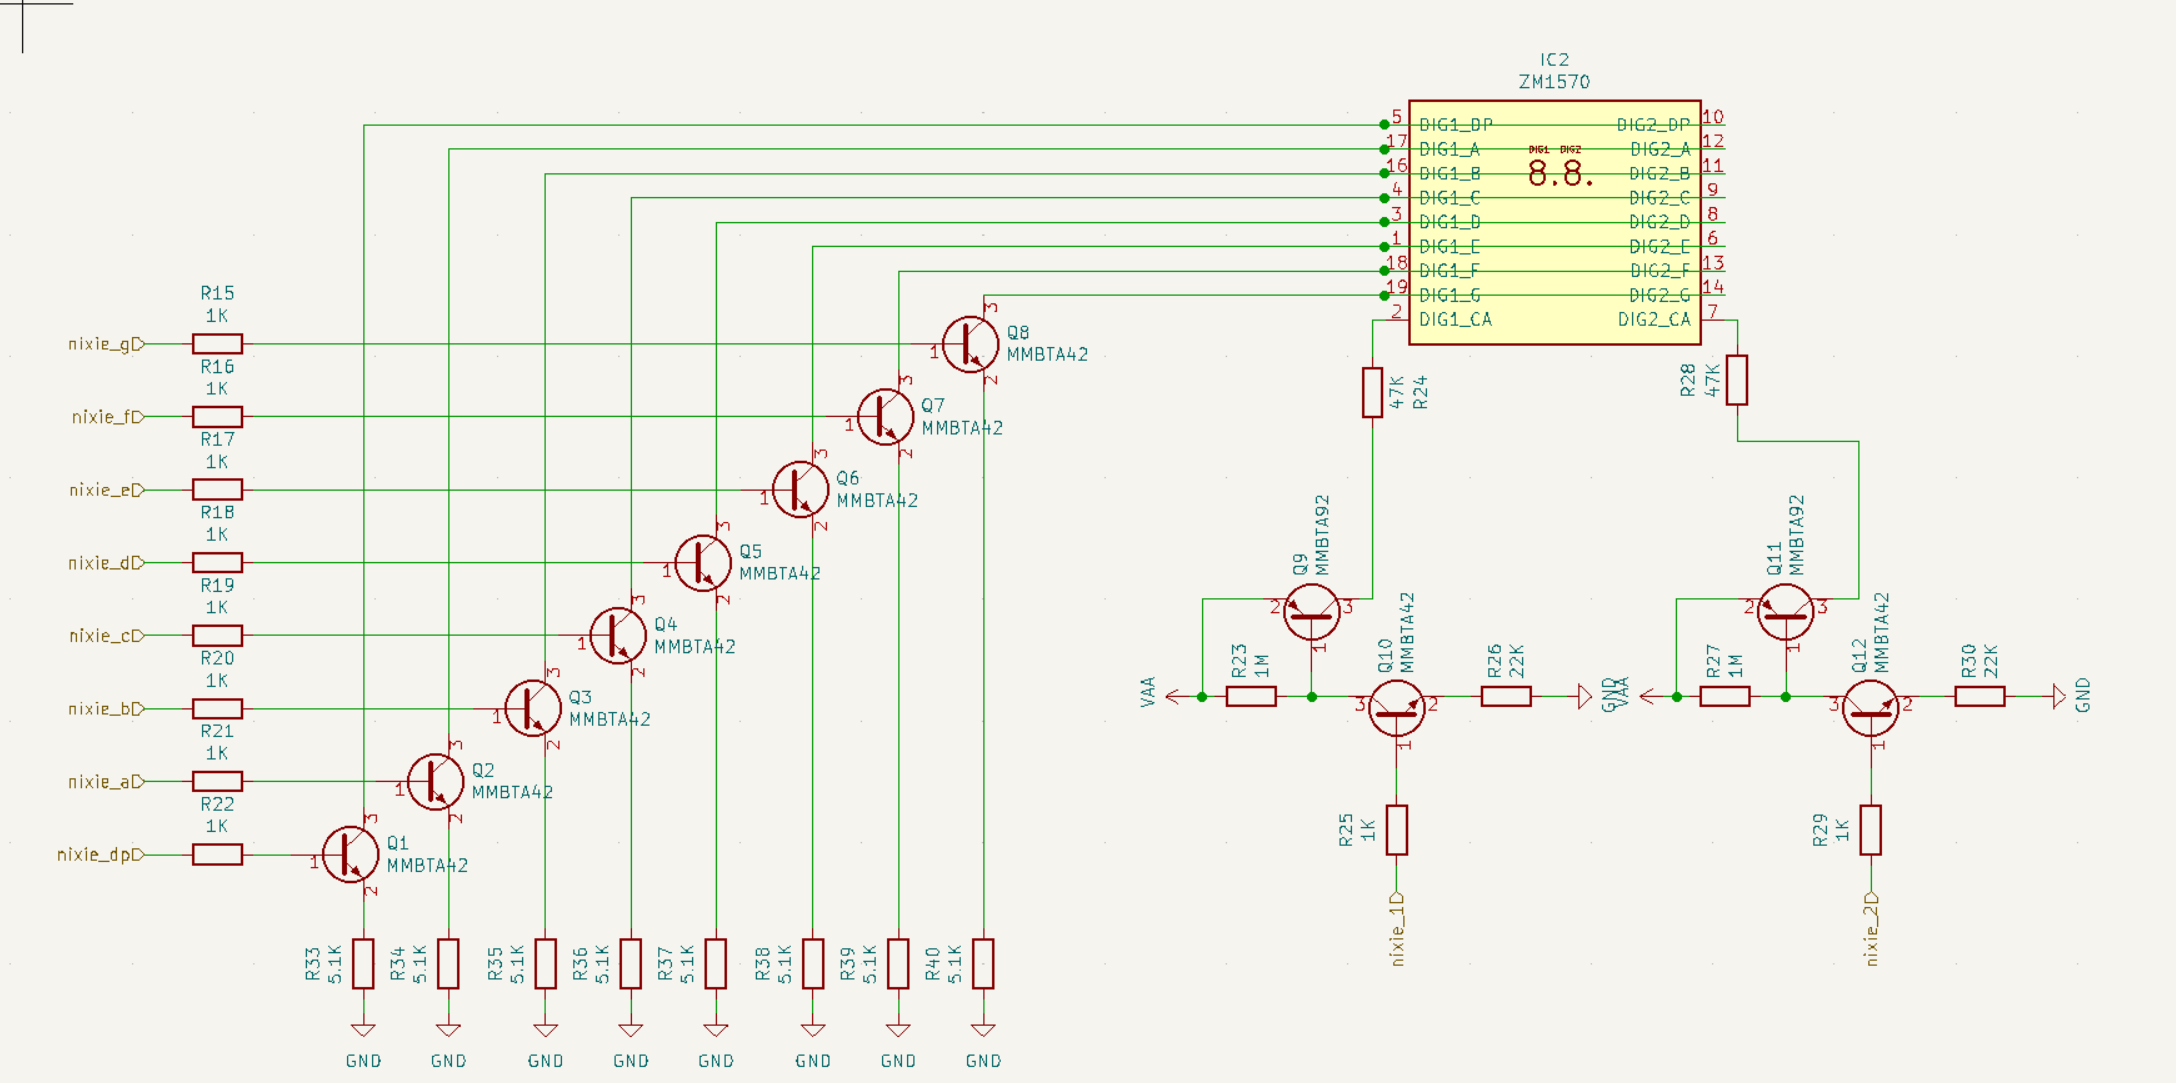
This display is the ZM1570, which according to the datasheet, is similar to the ZM1550 but a little radioactive, fun!
So let’s look at what it takes to make a watch with these and how small all the circuitry can be.
So for a simple watch, without any smart nonsense, just a few things are needed. A display, a simple microcontroller, a somewhat accurate clock source and a battery. Of course, this display also needs quite a unique power supply, so let’s start with tackling that.
The power supply
I wanted to power this watch via a small battery, assuming a small Lipo battery, that means roughly 3.8 volt. So to boost that all the way up to 200V while keeping things small is a bit of a challenge. After a lot of looking online, I discovered the LT8365 boost converter. It can boost up to a few dozen volts and then uses a voltage multiplier to get up to a few hundred volts. Awesome!
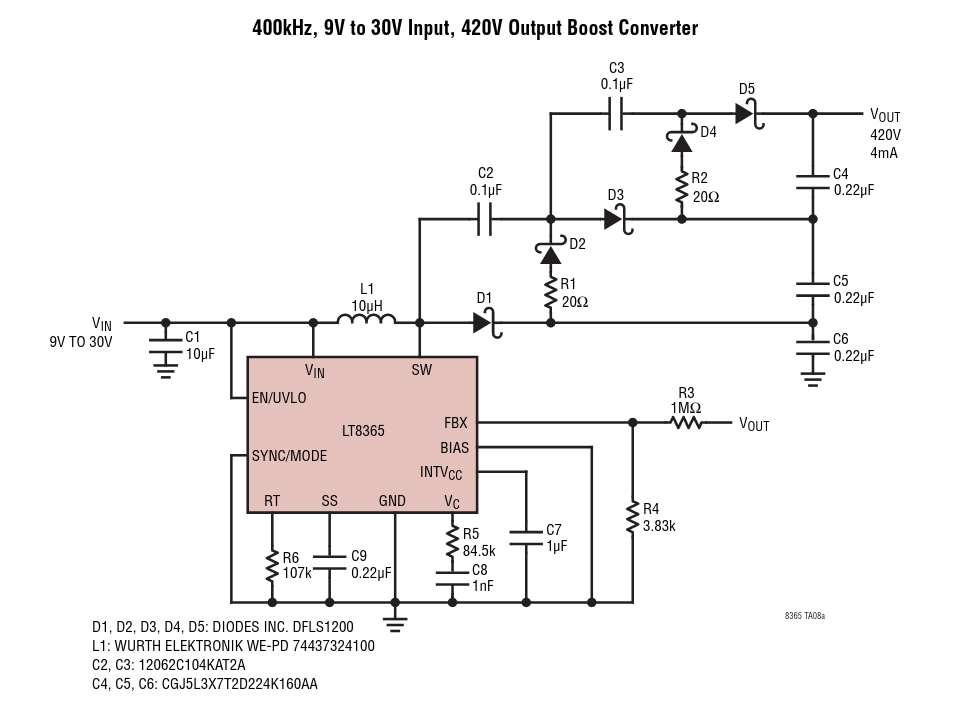
While it can do 3.7V all the way up to 200V according to one schematic in the datasheet, I added a small boost converter based on the LMR62014 to first boost to 12V and then to 200. This all worked as expected and the overall efficiency measured in real life was around 70%, not too bad!
I connected the enable pins to the microcontroller to save some power when the display is off.
An AP131-33 LDO to generate 3.3V and an MCP73831 Lipo charger finish the power supply part. All in all quite a few parts, but all are small SMD parts so size wise nothing too bad yet.
Power wise, the display needs about 1mA, which at 200V is 200mW, add in the efficiency and the display uses around 300mW when it’s turned on. A small Lipo might just be 200 to 300mAh, meaning with the display on, the watch will be empty in an hour! Best to keep it off as much as possible.
Microcontroller and display control
I made a Numitron clock before using the STM32F042, which is a small ARM M0 micro with USB support. For that numitron clock I added a 12Mhz external crystal to keep time and to have an accurate USB clock. I decided to do the same for this clock. Looking at the power used by the display, I decided a low power MCU like the STM32L series was perhaps not needed and I still had some F042’s.
This turned out to be a mistake, which I’ll come back to later.
As the display needs to be off as much as possible, I added a MPU-6050 gyro to just show the display when you look at it, like some smartwatches do as well.
To control the display, I used a bunch of MMBTA42 and MMBTS92 300V transistors. This document is a great help on how to control nixies and other HV stuff with transistors. To save parts, the 7 segment displays are multiplexed, just one is on at any given moment.
And that’s all, compared to the power supply, this almost seems simpler.
But there is one thing missing. How to enter time? I decided to just use USB for that. The STM32F042 supports USB so why not. Connect it to a computer and set the time seems usable enough.
Software stuff
In theory, the software should be pretty simple. Read in the Gyro, use a timer to keep track of time, display it when needed. Some USB stuff to enter time and that’s all. So a good reason to try some embedded Rust again. There even is a crate for the MPU-6050 and USB stuff. I didn’t use the popular RTIC framework, as a timer interrupt should be plenty for a simple project like this.
The software initializes the gyro, a timer for a 200Hz interrupt, the display, some IO & USB and then goes to sleep. Most of the work is done on the timer interrupt. The timekeeping is done here and checked if the display needs to show time. The timer is set to 200Hz to get a smooth display multiplexing, as any lower than 100Hz gives a visible flicker in the display.
Now, how to display time, as there are just 2 digits. Simple, hours first, then minutes. And last, the battery status. 00 here means 100% full.

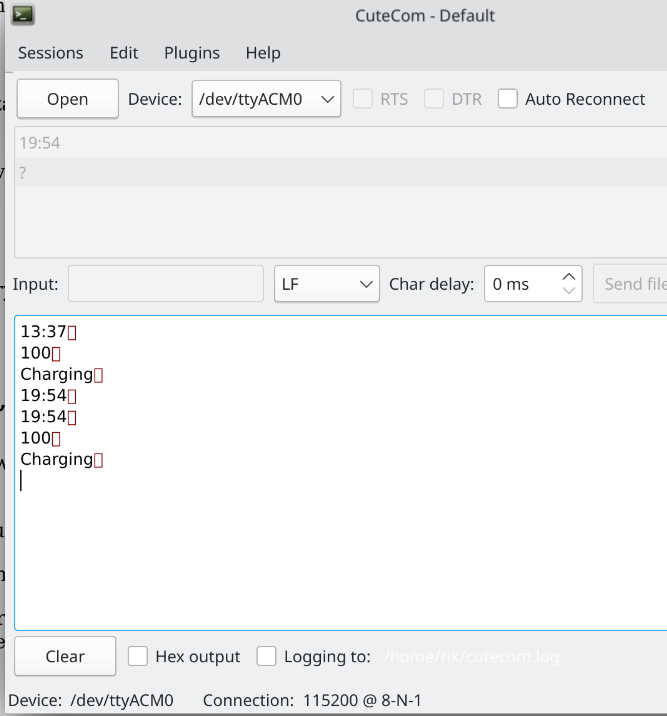
USB is used to set time, the STM32 emulates a COM port. Sending a ‘?’ character to the watch causes it to send the time, charge level and charge status back. To set a time, sending the new time over is all that is needed. For example, to set the time to 12:34, just send “12:34” over to the watch.
Using Rust made it possible to easily use existing code, for example the MPU-6050 driver and the USB drivers are all from crates.io. The biggest issue was debugging. With optimize off, the code does not fit in the MCU, and with optimizations on, debugging was quite difficult as a lot of variables where optimized away. But all in all it was a nice experience using Rust on an embedded platform. All the software can be found on my github.
Silicon shortage woes
So I got a first prototype which mostly worked, but it was still rather big and a few bugs sneaked in of course. Just a matter of optimizing size, fixing the bugs, ordering again and all is right. Right?
This was early 2020 and this blog is posted late 2022, so guess how that went :)
But the new PCB (on the right) is a lot smaller at least!
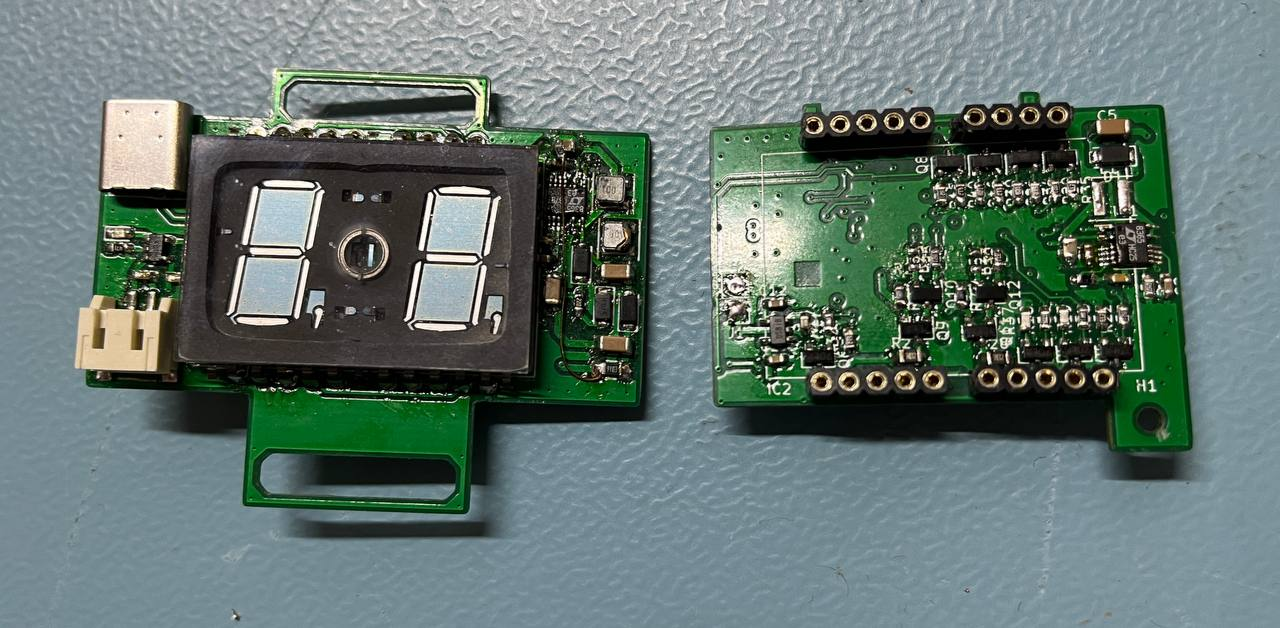
The super handy and small LT8365 was nowhere to be found. Even expensive brokers didn’t have it. And with that, this project ended up collecting dust for almost 2 years. I was finally able to buy 2 pieces of this chip to finish the watch and ordered the second prototype. Still some small bugs still exist but nothing major, and in an enclosure nobody can see a patch wire :)
Bugs and enclosure
So what bugs remain? The big one that I hinted on before, I did not pick a low power micro, and I only hooked up a 12Mhz high speed oscillator. All of that was fine for a wall powered clock but on a watch every uA counts. And because I didn’t have a 32Khz low power oscillator I could not put the MCU in any proper power saving state so the idle power consumption is around 3mA. With the display on it’s of course a ton more, but with this idle power the watch is empty after a weekend. Something that could have been weeks instead with that 32Khz in place.
A smaller bug was that I didn’t connect the IRQ pin from the MPU-6050 to the MCU, but that was fixed with a bodge wire.
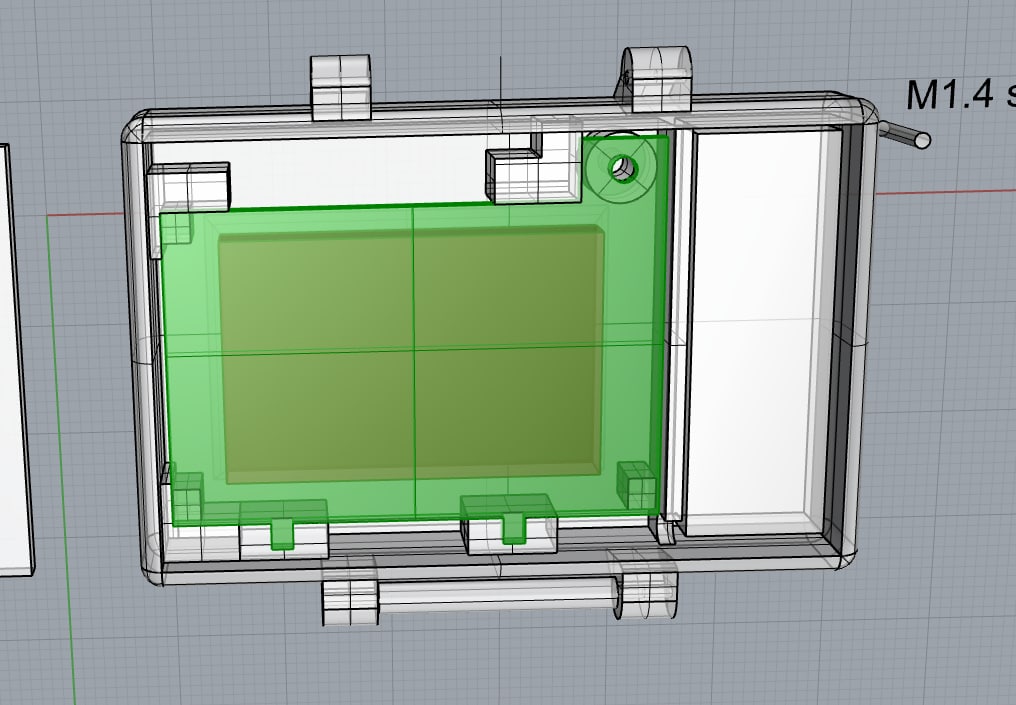
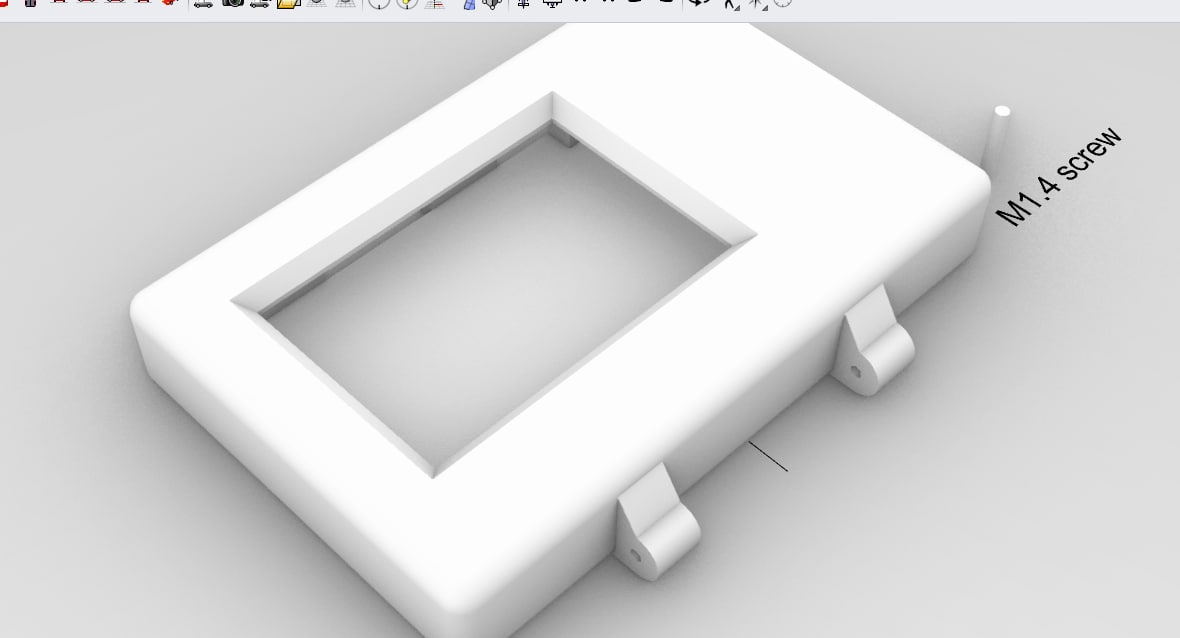
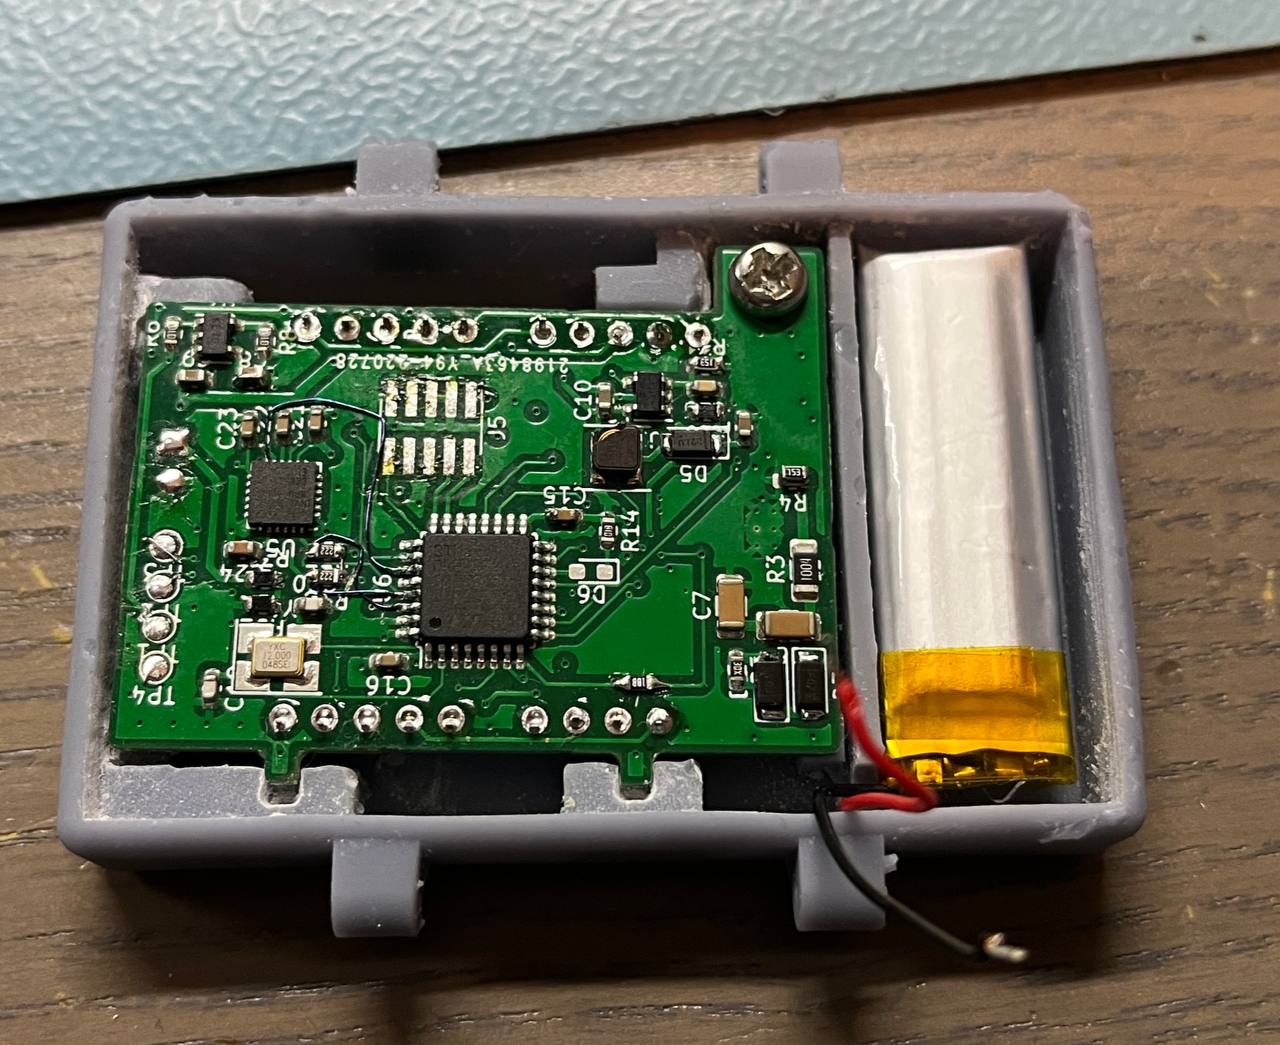
As I didn’t want to do another iteration with the hard to get parts, it’s fine for now. The watch might be small for a nixie like watch but it’s certainly still big. As I lack any 3D printers and 3D design skills, I bribed a friend into making me an enclosure. It’s a simple rectangular enclosure that, on a first try, is almost great. The tolerances are a little tight so a second revision is needed but hey, not bad at all.
What’s next
This project is not done, but done enough that I think it’s a good idea to document it in the form of this blog. A few things still have to happen, first of all, a reprint of the enclosure, perhaps with a wider strap so it all looks more in proportion.
A second issue is the charging situation. There are 4 pads on the watch to charge it, and I made a sort of working pogo pin board for it, but that’s not ideal.
So a proper stand should be made, but that’s a problem for future me. I won’t do another redesign for getting the idle power lowered, as this watch is absolutely a gimmick watch. It’ll be fun to wear at a hacker meetup or the likes, but not really for daily use. And then a weekend of use is actually pretty OK for that kind of use.
The power supply is, if you can get the boost converter, pretty awesome for a super small and efficient HV power supply. Perhaps I’ll re-use that design for some nixie stuff someday. I also learned a good bit on thinking about power management before making a design, next time for such a project I’ll definitely look at a low power micro like an STM32L series for example.
All in all, a fun project and I hope to re-do the enclosure soon and be able to wear this odd and fun watch on a few occasions. All software and hardware can be found on github.
If you enjoyed reading about this silly weird watch, why not buy me a coffee?
One Comment