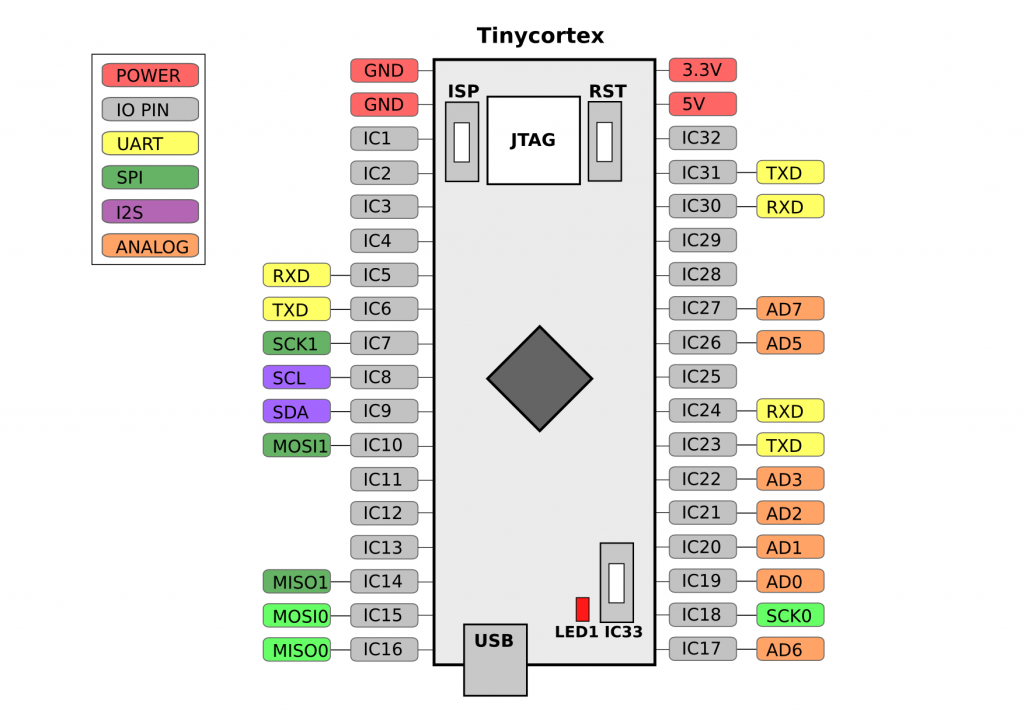
The last post described the dev board now called the Tinycortex. In this post I’m going to explain how to use it. All files can be found on the following github page. On this page you can find the hardware design files, a few scripts to make using them in Linux easier, a blink a led project that can be compiled offline and the pinout. The pinout of the Tinycortex is the following:
It has 32 IO pins, 3 UART, 2 SPI, 1 I2C and 8 analog inputs. It also has 1 LED and 1 button on the PCB for small tests and projects.
To use the Tinycortex in the MBED online compiler the MBED LPC11U24 can be selected. One header file needs to be included. It can be found on the github page or in the example blink a led project on the MBED website. After the header is added the pin names IC1 to IC33 and LED1 can be used in the code. Or you can import the blink a led example and modify that.
After compiling the MBED environment will generate a .bin file. To place this file on the Tinycortex connect it to the USB port with the ISP button pressed. Release the button after plugging it in and you should see a 32KB flash drive with one file, firmware.bin, on it. Remove this file and place the new .bin file on it. After that press the reset button (labeled RST) and the new code will be executed.


So, what do you think ?