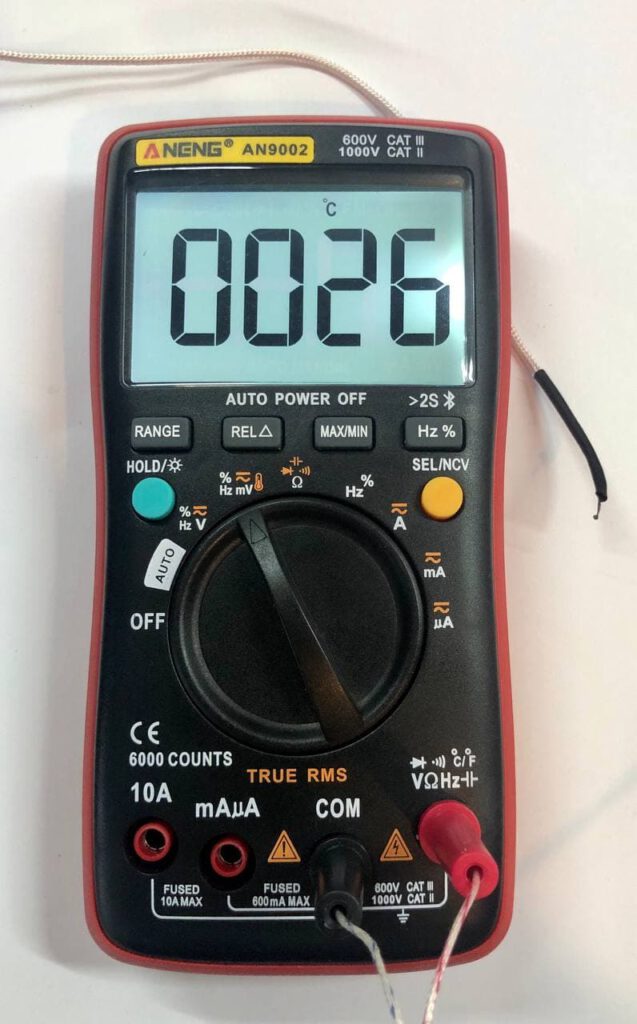
I have been using an Aneng AN8008 multi-meter for a while now and I quite like it. It’s small, accurate enough and has some interesting measurement options for embedded electronics. Moreover, it’s very affordable. Looking at what multi-meters Aneng also sells, I spotted a multi-meter with Bluetooth for a low price as well. Bluetooth in a multi-meter, that’s a new one for me. But thinking about it, for logging data, why not. It’ll be very galvanicly isolated at least :)

After receiving the meter and trying it out for a bit, the app left me a little disappointed. There is just a phone app that can show the values and log them, but sadly storing the logged data to a file is not possible. This is be useful if you want to analyze the data at a later time or put graphs in a report or such. So time to look at what makes the multi-meter tick and see if I can make my own data logger with it.
A look inside
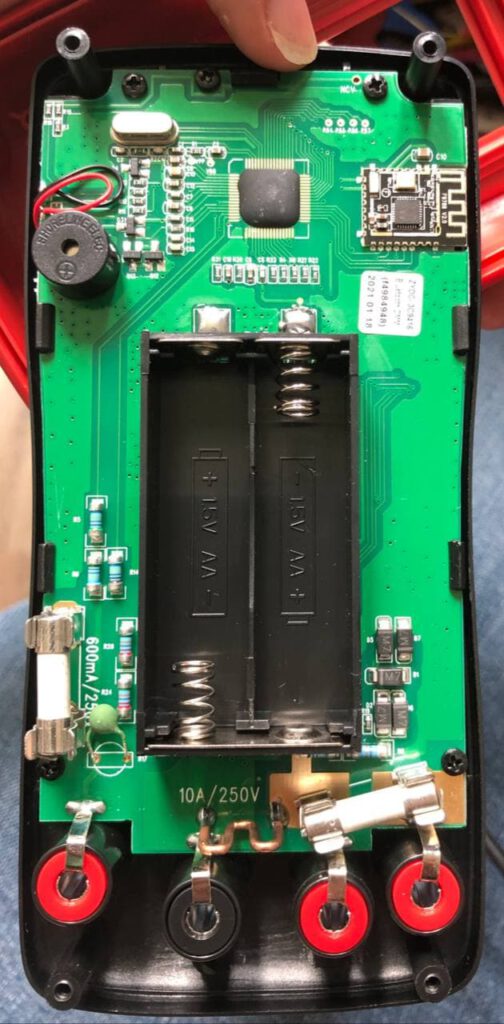
First of all, let’s look inside. Maybe an off the shelf multi-meter chip has been used and I can just find a datasheet for it.

Ah, black blob. Goodie. The black blob is connected to an F9788 Bluetooth module. At least the datasheet of that one can be found. It seems to be a BLE (Bluetooth Low Energy) module with an ARM9 core, interesting but not directly useful. I have worked with BLE before and still had the handy Nordic nRF Connect app installed on my phone. This app can scan, connect and show BLE services. BLE is an interesting protocol, with some unique ideas and terms. Luckily Adafruit has made a great introduction into the world of BLE.
One scan later revealed a device called “Bluetooth DMM”, goodie. Some poking in the advertised services and characteristics later I saw one called “Unknown Characteristic” that I could be notified off. The content is a 11 byte packet of data that changes if the display of the multi-meter changes. Bingo. Now to figure out it’s content.
As just an app on my phone would make this a bit of a hassle, I had a look at talking to it via a computer. A python library called Bleak came up and it seemed pretty nice. There are a few small examples on scanning, enabling notifications and such so that all looked like a great starting point. I used the examples to create a small script that enabled notifications on the magic characteristic and started reverse engineering. The entire code is just 25 lines:
import sys
import asyncio
import platform
from bleak import BleakClient

ADDRESS = ( "FC:58:FA:3C:94:16" )
CHARACTERISTIC_UUID = "0000fff4-0000-1000-8000-00805f9b34fb"

def notification_handler(sender, data):
    # Simple notification handler which prints the data received
    print("Data multimeter: {0}".format(data.hex(' ') ))

async def run(address):
    client = BleakClient(address)

    async with BleakClient(address) as client:
        await client.start_notify(CHARACTERISTIC_UUID, notification_handler)
        await asyncio.sleep(60.0)  #show data for a minute
        await client.stop_notify(CHARACTERISTIC_UUID)


if __name__ == "__main__":
    loop = asyncio.get_event_loop()
    loop.set_debug(False)
    loop.run_until_complete(run(ADDRESS))
It’s all segments
First I went for the low hanging fruit. With the inputs shorted and reading 0.000, switch the multi-meter between V, mV, Hz, A and such see what changes. In all cases a single bit of the 11 byte changed, often in the 4th or 8th byte. I decided to fill everything in in a spreadsheet to keep track of it. After the units where figured out, I set the multi-meter on manual mode to see if the dots operated in a similar way, and they did. A single bit changed when a dot appeared or disappeared.
Next up, the actual 7 segment displays. Looking at the Sigrok multi meter page for ideas, I saw quite some multi-meters just transmit the 7 segment data as raw 7 segment data. The data so far was send in binary, so I kind of expected this multi-meter to do the same. So armed with a lab power supply I changed the last digit from 0, to 1, to 2 and so on till it showed a 9. Analyzing the binary data, 2 bytes changed, or more precise, a 2 nibbles changed
Data multimeter: 1b 84 70 b1 49 2a f9 7e 66 fa 3b	Digit shown: 9
Data multimeter: 1b 84 70 b1 49 2a d9 7e 66 fa 3b	Digit shown: 8
Data multimeter: 1b 84 70 b1 49 2a b9 7b 66 fa 3b	Digit shown: 7
Data multimeter: 1b 84 70 b1 49 2a d9 76 66 fa 3b	Digit shown: 6
Data multimeter: 1b 84 70 b1 49 2a f9 76 66 fa 3b	Digit shown: 5
Data multimeter: 1b 84 70 b1 49 2a 79 7f 66 fa 3b	Digit shown: 4
Data multimeter: 1b 84 70 b1 49 2a b9 7e 66 fa 3b	Digit shown: 3
Data multimeter: 1b 84 70 b1 49 2a 99 7c 66 fa 3b	Digit shown: 2
Data multimeter: 1b 84 70 b1 49 2a 39 7b 66 fa 3b	Digit shown: 1
Data multimeter: 1b 84 70 b1 49 2a d9 7a 66 fa 3b	Digit shown: 0
Some manual decoding later and indeed, it seems to be 7 segment data just transmitted over Bluetooth, neat. Some bits are inverted, as in, the bit is 0 when the segment is on and 1 when the segment is off. Well, some coffee and a lot more decoding later, I had a somewhat complete spreadsheet with what each bit is doing. Time to finally make a program that logs me some data.
Connecting an AN9002 to a PC
With all that yak shaving done, time for the PC side of things. As I already was able to read in data via Python, I decided to turn the example code into something that could log data for me. I added some code to decode the incoming bytes and print out the value + unit. As a graph is always nice, I used the great matplotlib to graph it out. Store the data to a CSV file and perfect. Well ok, good enough. The multi-meter takes around 2.6 measurements per second and I have not found a way to change this.

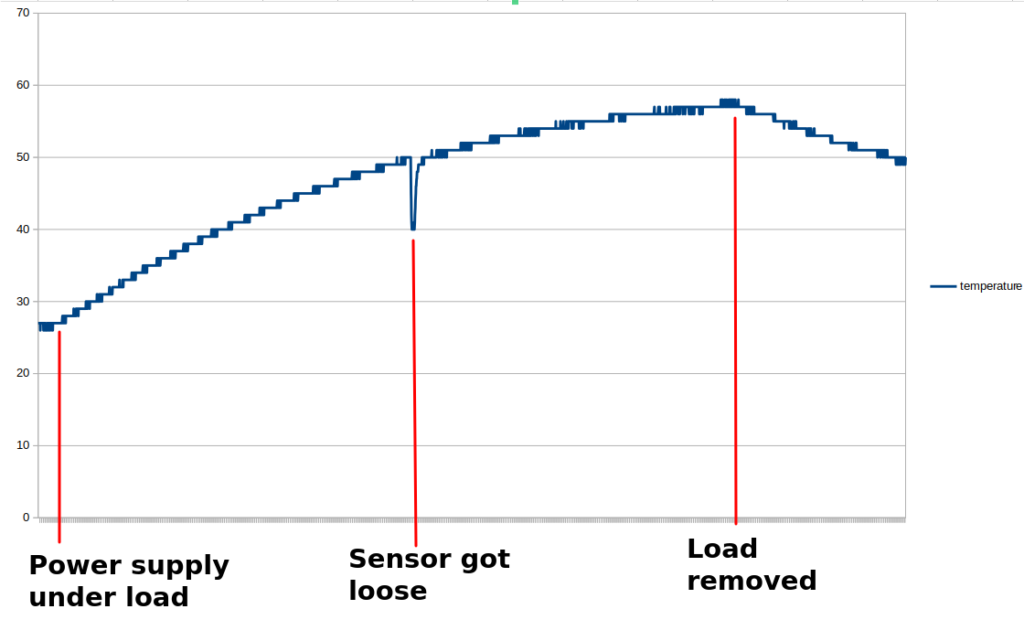
So let’s log some data. For example, the temperature of the heat sink of a lab power supply I really should finish soon:

Great, while not ideal, logging data and being able to manipulate it in a tool of my choice is, in my opinion, a big improvement. All the code can be found here, but keep in mind that I am by no means a python expert, or even a python novice.
If you enjoyed this project, consider buying me a coffee. And if you have this multi-meter, please do give it a try and let me know if it worked for you.


Hello, i wrote a Programm for a M5StickCPlus with a ESP32CPU
who receive the BT-Notifyies from a ANENG V05B DigitalMultimeter
I am working on a WiFi-Interface, so that every browser can
receive the Data from the DMM and display it in a pretty mode
You can find the Source at
https://m5.8266.de/?msel=stip_bt_dmm
That looks really neat, thanks for the comment!
Hi, do you have any idea about how to calibrate this Multimeter? Mine has a very large volume offset %
Hi, I am afraid I don’t and I am not sure if these are user calibrateable. Perhaps try and see if you can contact Aneng about this?
Wow! Your job is exactly what I am looking for! Incredible! I will try your prog even if i’m a noob :-)
I tried to launch your scripts on python all afternoon… without success. Could you create a tutorial please?
Awesome, runs as smooth as a baby’s bottom from scratch under Ubuntu! Thanks a lot. I agree with everything you said in the blog. Good instrument with poor documentation. I may fork you.
Here are the Github collection to all 4 BT-DMM ;-)
https://github.com/ludwich66/Bluetooth-DMM/wiki
Greatings ludwich
Ah cool, thanks!
The chip under the black blob is DTM0600 or similar. Here is the datasheet with the LCD segment numbering and serial protocol:
http://improwis.com/projects/reveng_multimeters/chips/dtm0660-brochure.pdf
Ah cool good to know!
How accurate is the an9002 compared to the an8008? I wanted to get the 9002 because of its Bluetooth support, but I haven’t seen that many people testing it’s accuracy
I haven’t tried it extensively but it seems to be around the same as the AN8008 I got.