

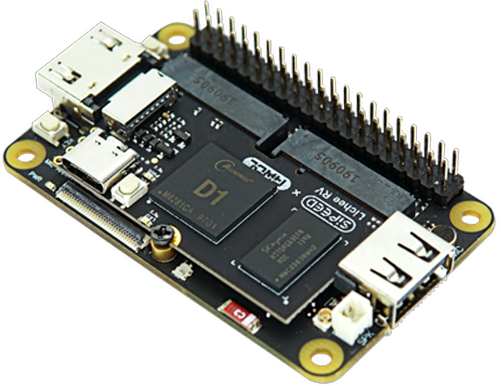
It took a few years, but it’s finally possible to order an affordable Linux capable RISCV CPU. The Lichee RV is a small System On Module (SOM) with the Allwinner D1 System on Chip (SoC). This SoC contains a 1Ghz RISCV64GCV single core CPU. The SOM comes with 512MB of RAM, although some 1GB versions have popped up, and costs less then 30 euro’s delivered. The CPU on the Allwinner D1 is also open source, which is pretty neat. Sipeed makes a ton of interesting boards, like the FPGA boards I recently covered. They didn’t sponsor this post, I just think they make cool stuff!
There is also a small dock that it can be mounted on that has HDMI, USB, Wifi and more broken out. But I wanted to have a few different interfaces. I like having good old Ethernet and I also wanted a headphone jack. So how hard can it be to design a dock with those interfaces and get Linux to co-operate? Let’s find out!
Features of the dock
Besides Ethernet and a headphone jack, I wanted the following things on my dock:
- USB C for power
- HDMI
- USB
- SPI flash
- 6 pin FTDI UART header for easy debugging
- RPI style GPIO header
Nothing too spectacular, so let’s get designing!
Hardware design
In the end 2 revisions of this board where made, because of course, this took more then one attempt. The first revision had several bugs and whoopsies, so a second attempt was needed.
Schematic
The Lichee RV does not need a lot of external parts, just a 5V power supply is enough. The parts on the dock like the Ethernet and SPI flash do need 3.3V though. The power supply for 3.3V is based around the very affordable LN3406 which I ordered a lot of at some point.
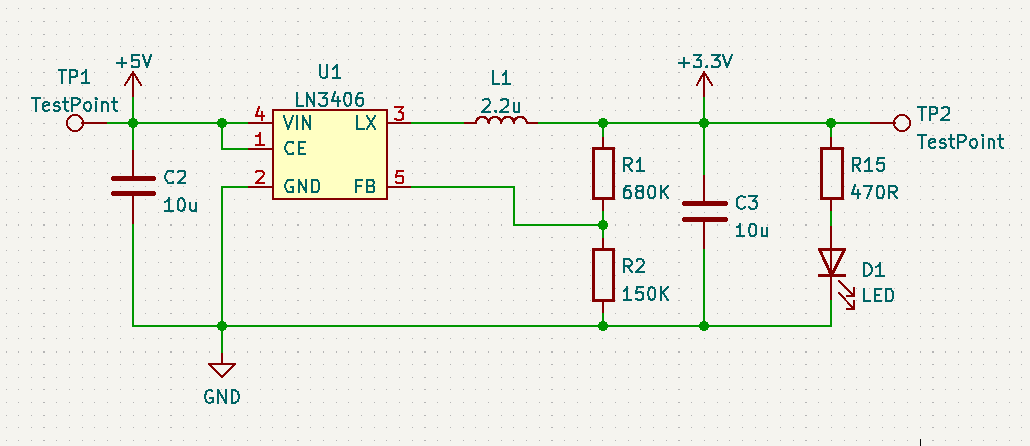
HDMI is very simple to add, I looked at the schematic of the existing dock and copied that. There are no external parts needed, just connect the HDMI to the SOM and call it a day, awesome.
The same goes for USB. I added a 100uF capacitor for decoupling but that’s all.
The SPI flash I used is the W25Q128, which is a 128Mbit/16MByte part. I wanted to have some on board flash for perhaps storing the kernel and to have something fun to poke around with on SPI. On the first revision I connected this to the SD card pins of the SOM. While SD cards can talk SPI, they mostly talk SDIO so that did not work. I did add an SD card slot onto the second revision and connected the SPI flash to the SPI pins. This gives plenty of storage options :)
The headphone jack is connected to the SOM using some 10uF series capacitors to block DC.
Ethernet
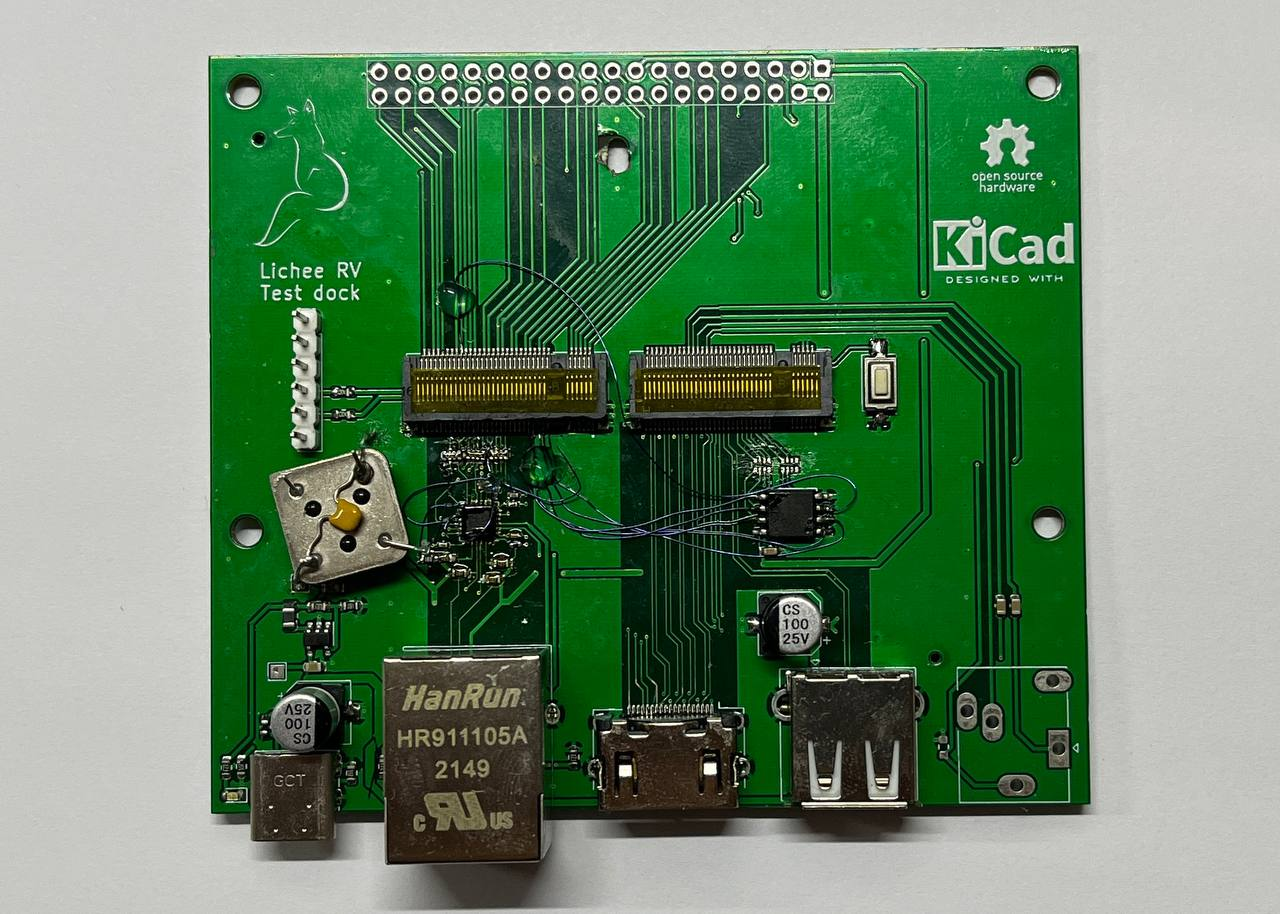
Finally the biggest part, Ethernet. The Lichee RV needs an Ethernet PHY. The first board I made used the LAN8720 Ethernet PHY. I made several mistakes in this design, I forgot a pull-up on the MDIO pin, thought the Lichee RV could provide a clock and connected 2 pins incorrectly. I managed to patch all of that which made the board look like this mess:
For the second revision I used the RTL8201F chip because there exists dock that uses this exact chip. The dock is called the RV-86 panel. Odd name, 86 for a RISCV panel but well. So instead of designing my own I’ll just borrow the schematic from that :) Bonus points for it being half the price. This is just a 100Mbit PHY but I doubt that will be a bottleneck for this CPU.

The schematic looks a little complex, as I added a few extra pull up/downs to possibly configure some options. In the end most where not needed, but better to have them than to lack them
With all of that out of the way, let’s look at the PCB!
PCB design
The schematic for the USB and HDMI is simple, but the board layout is not. Both of these interfaces are quite high speed and need an impedance controlled PCB design. The same also goes for Ethernet. To my surprise, JLCPCB actually offers this for no added cost on the 4 layer boards. So that is pretty awesome. And no, I am not sponsored by them (Yet, *wink wink*)
Some messing around with this awesome tool later and I have the differential pairs calculated, 0.15mm Width/0.35mm gap for HDMI and Ethernet, and 0.175/0.35mm for USB. Some placing and routing later and I ended up with this:

Sipeed does provide a 3D model of the Lichee RV, so let’s load that into Kicad and see how it looks.
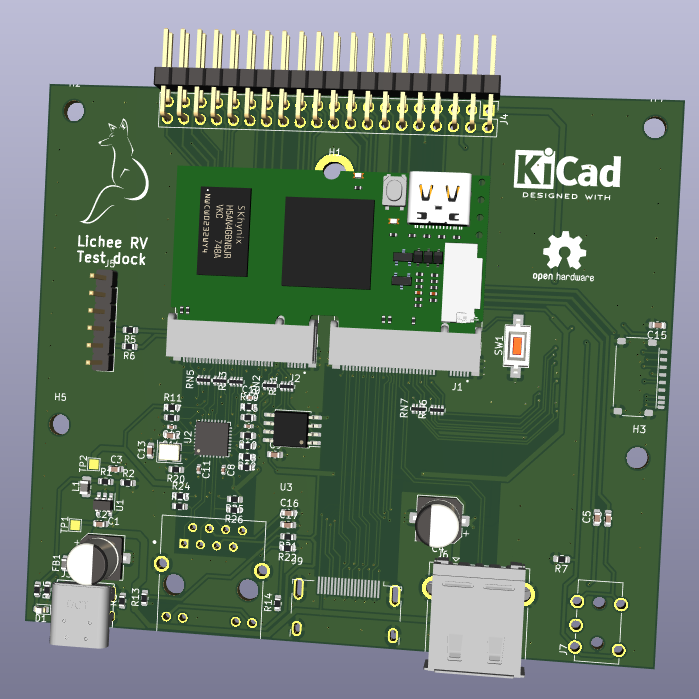
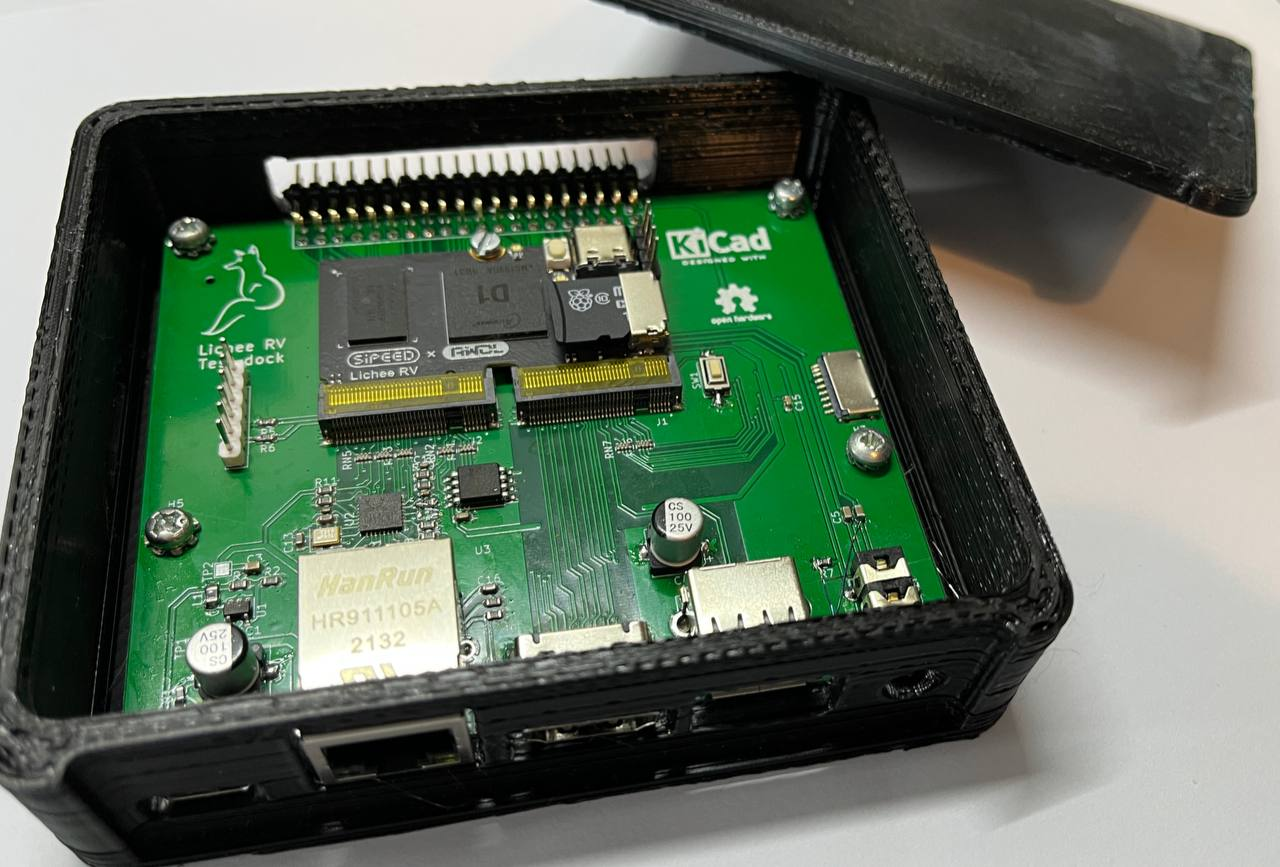
Awesome. A friend of mine even designed and 3D printed a simple case for it. Thanks Andrew!
JLCPCB did most of the assembly, but a few parts I placed manually as they where out of stock or parts I already had at home. In the end, the PCBs look like this, sadly 4 layer and assembly means the PCB must be green, perhaps something that will change in the future.
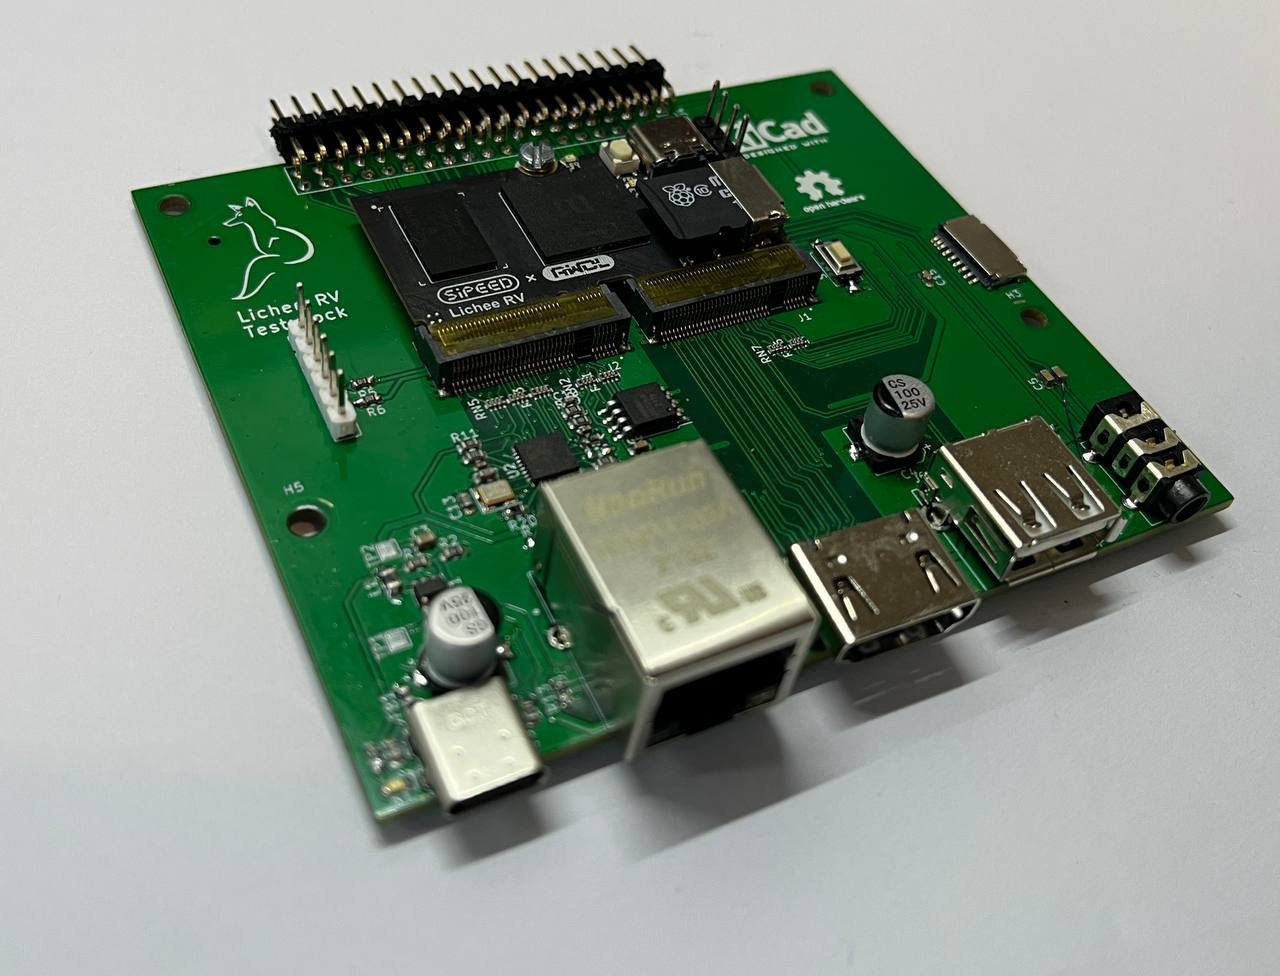
There are a few mistakes still in this board. The headphone jack and uSD slot are rotated 180 degrees, whoops. On the Ethernet side, the center of the Ethernet transformer is connected to 3.3V, it should be connected via a 10nF decoupling cap to ground. In the files on Github these issues are addressed.
Living on the bleeding edge
When I started with the first revision of the dock, there was a Debian image based on kernel 5.4 from Allwinner that had working HDMI and such. Sadly, this contains a lot of binary blobs, is behind registration and more typical Allwinner fun. Luckily a few people where already hard at work on getting features to work in the mainline kernel, but there was no HDMI or Ethernet yet.
When the second revision of the dock arrived, that has changed. smaeul did a ton of work getting almost everything working in a mainline kernel. While I started with the 5.4 kernel from Allwinner, now everything works on mainline, which is awesome! There are several scripts that download the bootloaders, kernel and an Arch Root filesystem, compile everything and create an image. This was really helpful for making a working image.
Not having all the drivers at release is one downside of bleeding edge tech, especially from a company like Allwinner who doesn’t always release all the needed info. Luckily the community is doing a lot to get Allwinner chips working on mainline Linux.
Custom device tree
On most ARM and RISCV SoCs, the Linux Kernel uses a device tree. This is a text file which contains all the information about the hardware. What and how much memory is connected, if a peripheral like SPI is used and so on. A DTS file contains the human readable version, which is compiled to the DTB binary the kernel uses.
On boot, Linux reads this file and loads the appropriate drivers so everything works as expected. For example:
&spi1 {
	pinctrl-0 = <&spi1_pd_pins>;
	pinctrl-names = "default";
	status = "okay";
	flash@0 {
		compatible = "winbond,w25q128",
					"jedec,spi-nor";
		reg = <0>;
	};
};
This contains the SPI with the SPI flash. The device tree lists the SPI used (SPI1), the pins used (spi1_pd_pins), that it is enabled ( status = “okay”) and what is connected to the SPI bus (The flash0 section)
For this board, I created a device tree based on the Lichee Dock. With the Arch build scripts I am using, the device tree is located in the u-boot bootloader. U-boot uses these for the same reason as Linux does. When U-boot starts the Linux kernel, it passes the location of the device tree so Linux can boot.
This means that I added a new device tree file in u-boot, compiled that using the script, flashed it on the SD card, booted Linux, check what works, and repeat. To get everything correct and working does take a some attempts and looking at existing device trees like the Sipeed dock and the Nezhia board.
The entire device tree can be found here and is complete enough that all interfaces on the board can be used.
Using the Lichee RV
As this is a Linux capable board with HDMI and USB, it can be used as a personal computer. I tried this with the Ubuntu image and the Arch one but it’s not fast. In terms of usable speed, it’s roughly like the first Raspberry pi. More cores and 2GB RAM would be really needed for this to be a desktop computer. The power consumption is quite low at 1 to 2 watts, even on load the CPU doesn’t get really warm.
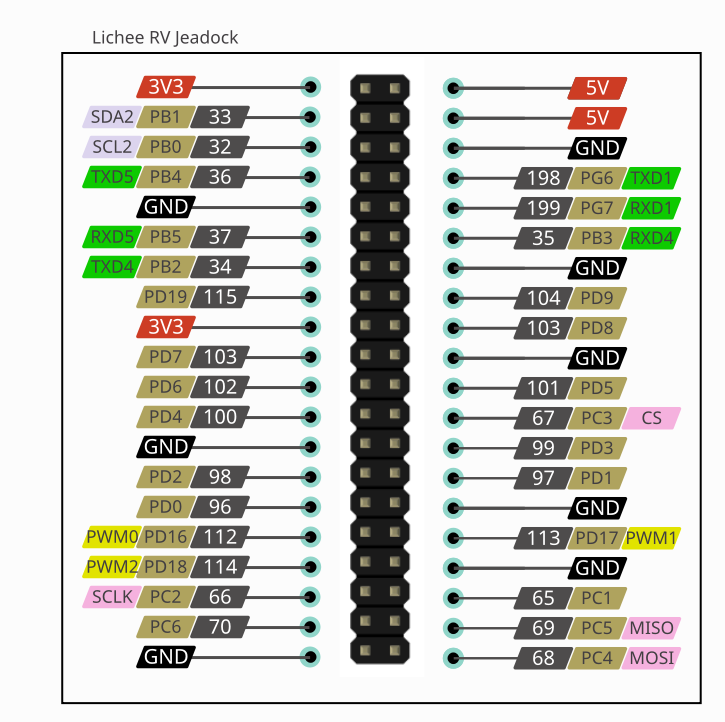
Now just like the Raspberry Pi, this board is much more usable as an embedded Linux machine. There is plenty of IO to connect sensors and devices and having Ethernet (or WiFi with the Sipeed Dock) means it can be used for all the kind of things a Raspberry Pi would also be used for. I created a nice looking pinout diagram for it, based on this video.
It would also be really cool to see BSD and perhaps even Haiku run on this. Perhaps something for in the future.
Conclusion
Making a custom dock or board for a Linux SOM can seem a little daunting, but it’s often not too difficult. With a SOM from a big brand like Toradex, Raspberry Pi or Variscite they have tons of info online, but even with a SOM like this it’s very doable. Being able to order cheap 4 layer PCBs with impedance checked stackups is pretty amazing and helpful for boards like this. All the HW, SW and case files can be found on my Github.
If you enjoyed this blog, consider buying me a coffee!
Amazing work, thanks for sharing all the details.